Let's learn how to set up Traffic Control.
Traffic Control is a feature to divide traffic of ad groups. It is set up through ad groups within each campaign. You can utilize this feature to compare the performance of different settings within ad groups, or split traffics for the same audience into multiple ad groups without duplication.
Set up Traffic Control
You can set up Traffic Control within each campaign under the ad group section.
-
Select your ad account from the drop-down menu.
-
Select your app on the left sidebar menu.
- Select the campaign you want to set up Traffic Control from the right main area.
-
Scroll down to the ad group list under that campaign.

-
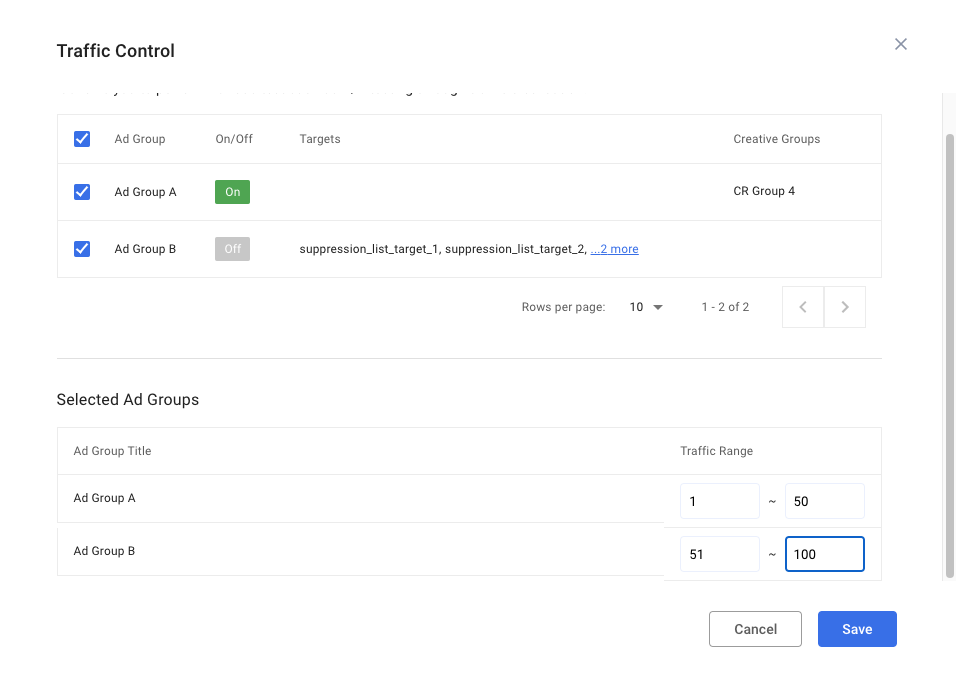
Click Traffic Control. You'll see the setting options like the screenshot below.
Important: Make sure you create the ad groups before you set up Traffic Control. Learn more about ad group settings.
-
Click on the checkboxes in front of the ad groups you want to set up Traffic Control.
-
Select the Traffic Range of each ad group.
Note: The traffic range refers to the audience split. You can split the traffic to whatever you wish from 1 to 100 (i.e., 50:50, 75:25, 90:10, etc.). The example above shows an even 50:50 traffic split.
Important: Splitting the traffic does not ensure the same spending ratio. For example, a 50:50 traffic split does not ensure even budget consumption of each ad group. If you wish to control the budget consumption of each group, we recommend creating multiple campaigns. You can create as many campaigns as needed, adjust traffic and allocate the desired budget per campaign.
- Click Save.
Important: Make sure the selected ad groups are turned ON .